In this tutorial, we’ll take a quick look at how to create a simple layout by only using the visual editing tools and without touching the code.
Downloads
To follow this tutorial, you can download the source file, which will help you compare your progress.
Inspector
You can use the inspector to edit your styling such as text content, font, weight, color, etc. Everytime that you edit, the changes will also be reflected in the code. Just like in the design tool, the blue lines indicate the bounds of the element.

Text("SwiftUI for iOS 14")
    .font(.title2)
    .fontWeight(.bold)
Insert Menu
The Insert Menu (Cmd Shift L) is great for bringing new elements. You can find a long list of all the controls available in iOS such as button, color picker, date picket, etc. You can drag and drop an item from the Insert Menu to the Preview or the code.

VStack(spacing: 8.0) {
    Circle()
        .frame(width: 44.0, height: 44.0)
    Text("SwiftUI for iOS 14")
        .font(.title)
        .fontWeight(.bold)
    Text("20 videos")
}
Modifiers
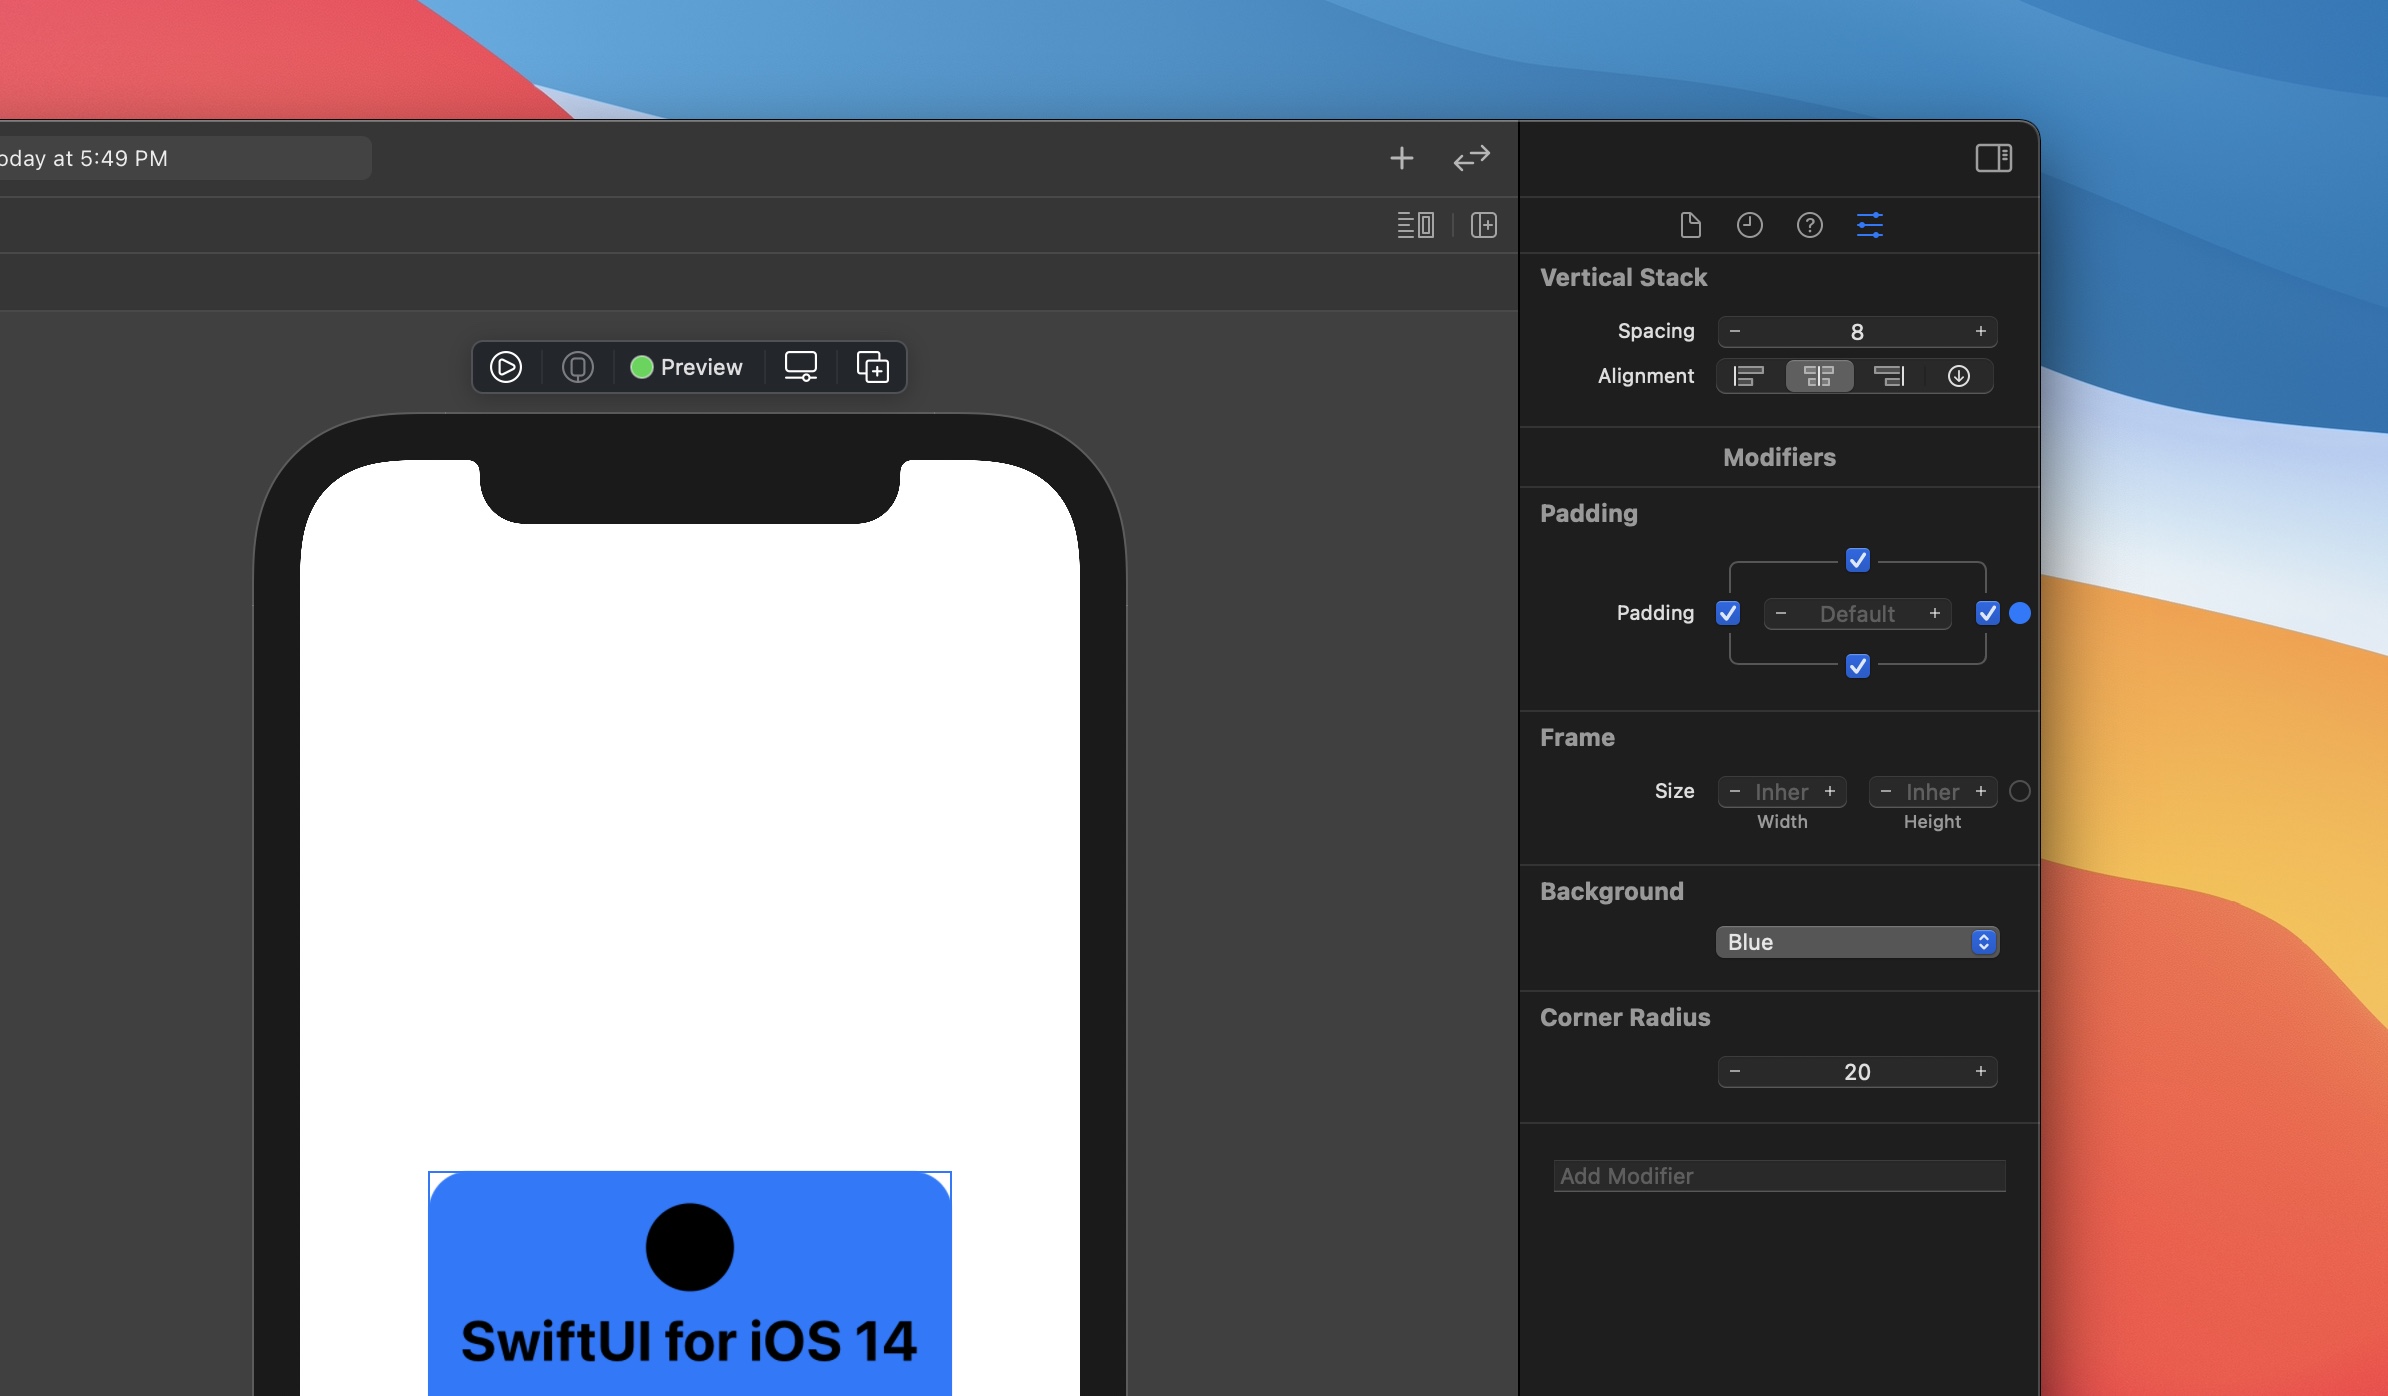
The Inspector doesn’t have all the styling options. For more modifiers, you can go to the Modifiers search field and find properties like background and cornerRadius.

VStack(alignment: .center, spacing: 8.0) { }
    .padding(.all)
    .background(Color.blue)
    .cornerRadius(20.0)
Final Code

VStack(alignment: .center, spacing: 8.0) {
    Circle()
        .frame(width: 44.0, height: 44.0)
    Text("SwiftUI for iOS 14")
        .font(.title)
        .fontWeight(.bold)
    Text("20 videos")
}
.padding(.all)
.background(Color.blue)
.cornerRadius(20.0)
READ NEXT
