Discover the exciting world of software development and design.
Add a beautiful background animation to your SwiftUI application similar to Stripe’s home page animation. In this section, we’ll cover the basics of unit points, create a timer to animation the gradient and play with masking and blurs.
To follow this tutorial, you can download the source file, which will help you compare your progress.
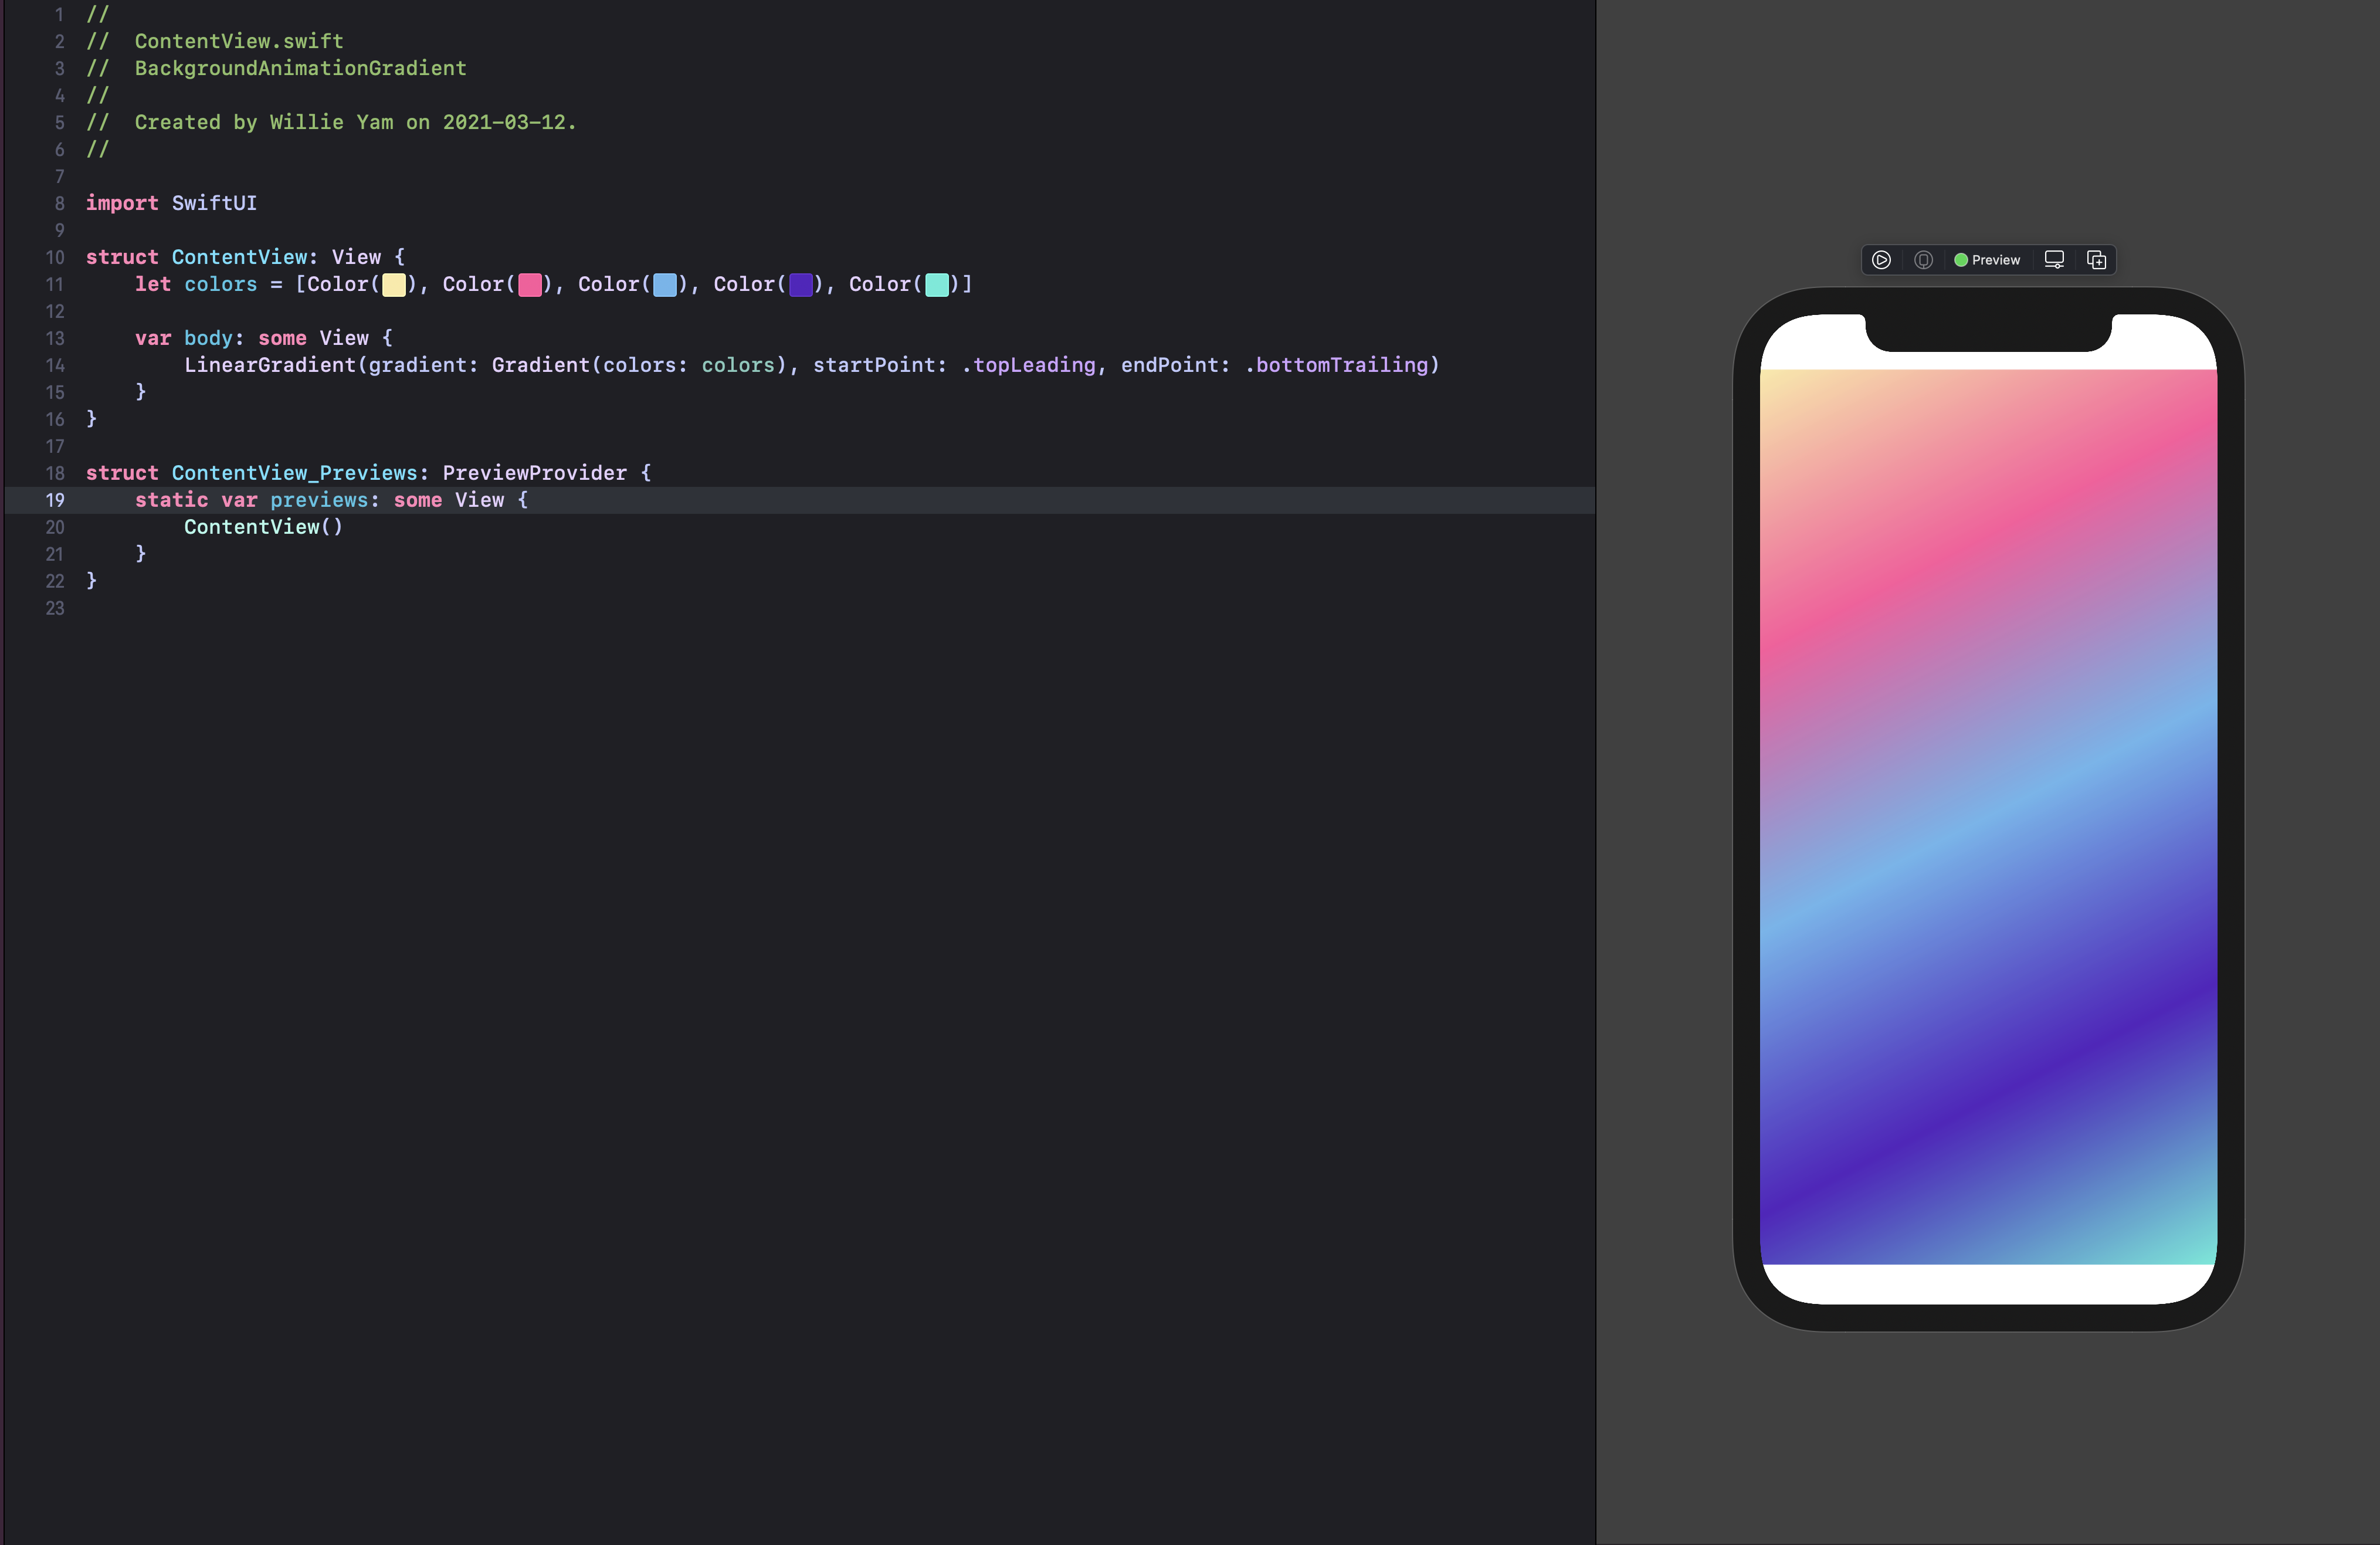
Let’s start with a basic linear background view. Store the list of colors in colors variable. To change the orientation of the gradient, set the starting point to topLeading and the end point to bottomTrailing .
struct ContentView: View {
    let colors = [Color(#colorLiteral(red: 0.9843137255, green: 0.9176470588, blue: 0.6470588235, alpha: 1)), Color(#colorLiteral(red: 1, green: 0.3333333333, blue: 0.6117647059, alpha: 1)), Color(#colorLiteral(red: 0.4156862745, green: 0.7098039216, blue: 0.9294117647, alpha: 1)), Color(#colorLiteral(red: 0.337254902, green: 0.1137254902, blue: 0.7490196078, alpha: 1)), Color(#colorLiteral(red: 0.337254902, green: 0.9215686275, blue: 0.8509803922, alpha: 1))]

    var body: some View {
        LinearGradient(gradient: Gradient(colors: colors), startPoint: .topLeading, endPoint: .bottomTrailing)
    }
}
Now, the only issue we have is that the gradient doesn’t cover the entire screen because of the safe area. To cover the entire screen, just add the modifier . edgesIgnoringSafeArea.
LinearGradient(gradient: Gradient(colors: colors), startPoint: .topLeading, endPoint: .bottomTrailing)
.edgesIgnoringSafeArea(.all)To animate the gradient, we have to change the value of the startPoint and endPoint over time. To understand better the how we can play with these values, we need to learn about UnitPoints. Think of UnitPoints as points in a cartesian plane. In SwiftUI, there are default values already programmed for you, and they are shown in the schema below.

Since UnitPoints are any point in a cartesian plane, we can set any value we want for the x position as well as the y position.
Let’s declare two new variables – start and end . They will both be UnitPoints, and we’ll set the initial points as below. They are simply the raw value of .topLeading and .bottomTrailing values that are already programmed for you in SwiftUI.
@State var start = UnitPoint(x: 0, y: 0)
@State var end = UnitPoint(x: 1, y: 1)
In the LinearGradient , we’ll need to use these variables instead of .topLeading and .bottomTrailing.
LinearGradient(gradient: Gradient(colors: colors), startPoint: start, endPoint: end)
		.edgesIgnoringSafeArea(.all)
The gradient should look like this in the preview:

Now, if we change the x and y values of each variable, we can see that the gradient is changing position.
@State var start = UnitPoint(x: 0, y: -2)
@State var end = UnitPoint(x: 4, y: 0)
Next, let’s add a timer. This timer will allow us to change the gradient over time. SwiftUI comes with multiple built-in methods. One of them is the Timer method, which allows you to run an action with a time interval. Here’s we will set it to one second.
let timer = Timer.publish(every: 1, on: .main, in: .default).autoconnect()Then, on the gradient view, add an onReceive modifier. This modifier will allow us to perform a moving animation with our gradient. It takes a publisher, which is our timer, and an action to perform whenever the publisher changes.
In our case, every time the timer changes, we want to change the position of the start and end point.
.onReceive(timer, perform: { _ in
                self.start = UnitPoint(x: 4, y: 0)
                self.end = UnitPoint(x: 0, y: 2)
                self.start = UnitPoint(x: -4, y: 20)
                self.start = UnitPoint(x: 4, y: 0)
})However, the animation on the preview seems to be glitching. So let’s add an easeInOut animation with a repeatForever modifier with autoreverse . This means that the animation will have a nice transition to the next position and it will also loop.
.animation(Animation.easeInOut(duration: 10).repeatForever(autoreverses: true).speed(0.5))Using the linear gradient, this will be our final code:
struct ContentView: View {
    @State var start = UnitPoint(x: 0, y: -2)
    @State var end = UnitPoint(x: 4, y: 0)

    let timer = Timer.publish(every: 1, on: .main, in: .default).autoconnect()
    let colors = [Color(#colorLiteral(red: 0.9843137255, green: 0.9176470588, blue: 0.6470588235, alpha: 1)), Color(#colorLiteral(red: 1, green: 0.3333333333, blue: 0.6117647059, alpha: 1)), Color(#colorLiteral(red: 0.4156862745, green: 0.7098039216, blue: 0.9294117647, alpha: 1)), Color(#colorLiteral(red: 0.337254902, green: 0.1137254902, blue: 0.7490196078, alpha: 1)), Color(#colorLiteral(red: 0.337254902, green: 0.9215686275, blue: 0.8509803922, alpha: 1))]

    var body: some View {
        LinearGradient(gradient: Gradient(colors: colors), startPoint: start, endPoint: end)
            .animation(Animation.easeInOut(duration: 10).repeatForever(autoreverses: true).speed(0.5))
            .onReceive(timer, perform: { _ in
                self.start = UnitPoint(x: 4, y: 0)
                self.end = UnitPoint(x: 0, y: 2)
                self.start = UnitPoint(x: -4, y: 20)
                self.start = UnitPoint(x: 4, y: 0)
            })
    }
}You can add your animation in a custom shape. First, code-split your code by putting the LinearGradient in a new variable.
var background: some View {
LinearGradient(gradient: Gradient(colors: colors), startPoint: start, endPoint: end).edgesIgnoringSafeArea(.all)
.animation(Animation.easeInOut(duration: 10).repeatForever(autoreverses: true).speed(0.5))
.onReceive(timer, perform: { _ in
self.start = UnitPoint(x: 4, y: 0)
self.end = UnitPoint(x: 0, y: 2)
self.start = UnitPoint(x: -4, y: 20)
self.start = UnitPoint(x: 4, y: 0)
})
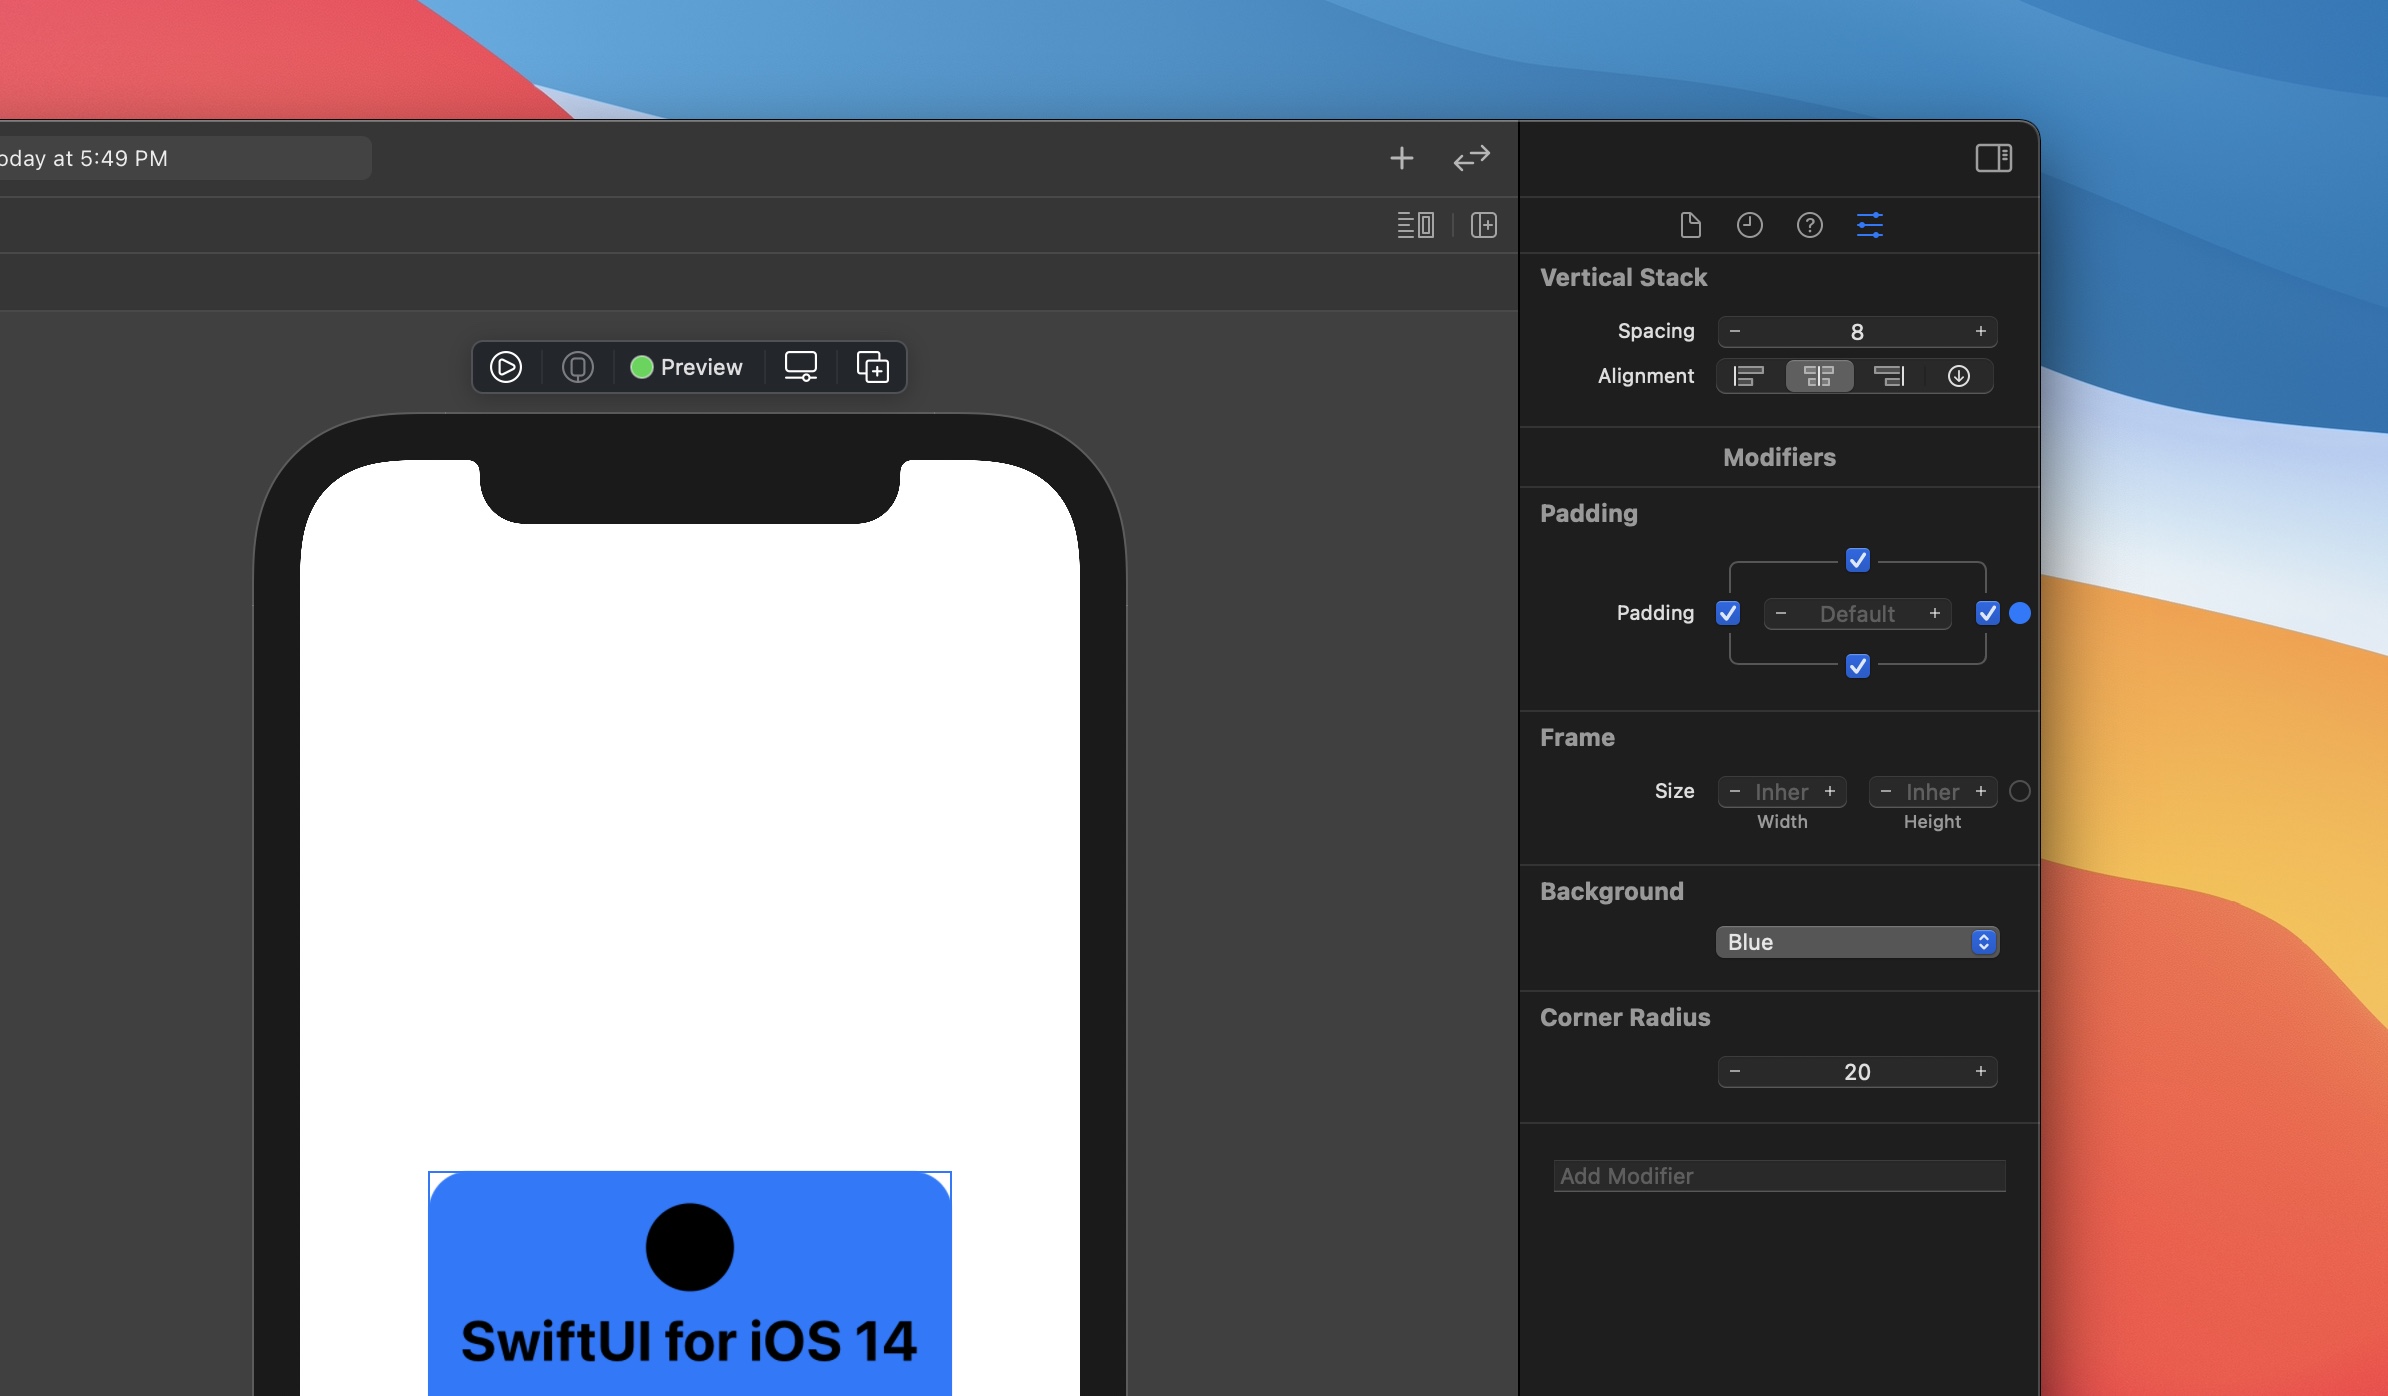
}Then, call the background variable in your body and add a .blur , .mask and .frame modifiers.
var body: some View {
		background
				.blur(radius: 10)
				.mask(Circle())
        .frame(width: 200, height: 200, alignment: .center)
}
The final code with blur and mask is:
struct ContentView: View {
    @State var start = UnitPoint(x: 0, y: -2)
    @State var end = UnitPoint(x: 4, y: 0)

    let colors = [Color(#colorLiteral(red: 0.9843137255, green: 0.9176470588, blue: 0.6470588235, alpha: 1)), Color(#colorLiteral(red: 1, green: 0.3333333333, blue: 0.6117647059, alpha: 1)), Color(#colorLiteral(red: 0.4156862745, green: 0.7098039216, blue: 0.9294117647, alpha: 1)), Color(#colorLiteral(red: 0.337254902, green: 0.1137254902, blue: 0.7490196078, alpha: 1)), Color(#colorLiteral(red: 0.337254902, green: 0.9215686275, blue: 0.8509803922, alpha: 1))]
    let timer = Timer.publish(every: 1, on: .main, in: .default).autoconnect()

    var body: some View {
        background
            .blur(radius: 10)
            .mask(Circle())
            .frame(width: 200, height: 200, alignment: .center)
    }

    var background: some View {
        LinearGradient(gradient: Gradient(colors: colors), startPoint: start, endPoint: end).edgesIgnoringSafeArea(.all)
            .animation(Animation.easeInOut(duration: 10).repeatForever(autoreverses: true).speed(0.5))
            .onReceive(timer, perform: { _ in
                self.start = UnitPoint(x: 4, y: 0)
                self.end = UnitPoint(x: 0, y: 2)
                self.start = UnitPoint(x: -4, y: 20)
                self.start = UnitPoint(x: 4, y: 0)
            })
    }
}Instead of using the linear gradient, you can also use the angular gradient.
var angularBackground: some View {
		AngularGradient(gradient: Gradient(colors: colors), center: .center ).edgesIgnoringSafeArea(.all)
}
Angular gradient doesn’t use UnitPoint, but Angle instead.
@State var startAngle = 0
@State var endAngle = 360

AngularGradient(gradient: Gradient(colors: colors), center: .center, startAngle: .degrees(Double(startAngle)), endAngle: .degrees(Double(endAngle)) ).edgesIgnoringSafeArea(.all)
And add degrees to the start and end angle.
.animation(Animation.easeInOut(duration: 5).repeatForever(autoreverses: true))
            .onReceive(timer, perform: { _ in
                self.startAngle += 10
                self.endAngle += 5
            })
Then call the angularBackground in your body and add your blur, mask and frame modifiers.
var body: some View {
        angularBackground
            .blur(radius: 10)
            .mask(Circle())
            .frame(width: 200, height: 200, alignment: .center)
}If you have a custom shape and want to convert it to Path, you can use https://quassummanus.github.io/SVG-to-SwiftUI/ made by Antoni Silvestrovič. It formats your SVG code to SwiftUI path code. Then, use the MyCustomShape as the masking.
struct MyCustomShape: Shape {
    func path(in rect: CGRect) -> Path {
        var path = Path()
        let width = rect.size.width
        let height = rect.size.height
        path.move(to: CGPoint(x: 0.68853*width, y: 0.34512*height))
        path.addCurve(to: CGPoint(x: 0.94383*width, y: 0.26137*height), control1: CGPoint(x: 0.76897*width, y: 0.17494*height), control2: CGPoint(x: 0.90264*width, y: 0.22161*height))
        path.addCurve(to: CGPoint(x: 0.86137*width, y: 0.58436*height), control1: CGPoint(x: 1.05193*width, y: 0.40806*height), control2: CGPoint(x: 0.88432*width, y: 0.5034*height))
        path.addCurve(to: CGPoint(x: 0.76495*width, y: 0.92605*height), control1: CGPoint(x: 0.83267*width, y: 0.68557*height), control2: CGPoint(x: 0.86022*width, y: 0.86763*height))
        path.addCurve(to: CGPoint(x: 0.49349*width, y: 0.74423*height), control1: CGPoint(x: 0.66968*width, y: 0.98448*height), control2: CGPoint(x: 0.5657*width, y: 0.89391*height))
        path.addCurve(to: CGPoint(x: 0.19491*width, y: 0.59547*height), control1: CGPoint(x: 0.42128*width, y: 0.59456*height), control2: CGPoint(x: 0.41041*width, y: 0.65535*height))
        path.addCurve(to: CGPoint(x: 0.10986*width, y: 0.30014*height), control1: CGPoint(x: 0.02251*width, y: 0.54757*height), control2: CGPoint(x: 0.0411*width, y: 0.36845*height))
        path.addCurve(to: CGPoint(x: 0.37931*width, y: 0.33499*height), control1: CGPoint(x: 0.17002*width, y: 0.24037*height), control2: CGPoint(x: 0.27653*width, y: 0.19812*height))
        path.addCurve(to: CGPoint(x: 0.68853*width, y: 0.34512*height), control1: CGPoint(x: 0.50778*width, y: 0.50606*height), control2: CGPoint(x: 0.59192*width, y: 0.54952*height))
        path.closeSubpath()
        return path
    }
}
Discover the exciting world of software development and design with our comprehensive courses in React, Swift, and other cutting-edge technologies.